Sunday, 3 April 2011

Panoramio April 2011 Contest

You are only allowed to enter a max of 5 photographs each month. I also seem to understand that there is limited amount of storage space for each member, well not unlimited or as wide as in other applications. But I like that. This limitation allows you (or forces you) to only focus on your best shots. In addition to this, the mapping is a little time consuming too, and I cannot imagine myself wanting to do this with all my pics if no selection was required.
Anyway here are the shots I have selected to enter the April 2011 Panoramio contest.

Travel - Loch Beoraid Wide Angle

Travel - Loch Chiarain Bothy

Scenery - Inveraray Fishing Boat

Scenery - Inveraray in Spring

Scenery - Loch Beoraid

Saturday, 2 April 2011

Denis Red Sauce v3.1


This recipe is made of four main parts.
  1. The Cooked Red Sauce which I usually batch cook and freeze in portions
  2. The Raw Fresh Herbs, Spices and Oils are added raw on top of the dish
  3. The Boiled Wholemeal Brown Pasta prepared just before the meal
  4. The Roasted Vegetables (optional but absolutely a real fine final touch)

Red Sauce

I bought this large pot which is really meant for cooking seasonal fruit jam in large quantities. I found it in second hand shop looking new as it was probably used once every five years. Guess how much i paid for it? £5.00.


I used to chop everything by hand. Then, my ex-dear ex, bought me a food processor. Lately I have discovered frozen already chopped vegetables.  

Fresh is better than Frozen. Frozen is better than Tinned. 
Tinned is better than nothing.

The following quantities are meant for batch cooking and freezing.
This is the list of what goes in the sauce and in the pot:
  1. Sieved tomatoes passata (8 cartons Tesco brand)
  2. Tomatoes (20 fresh and diced or 4 bags of already diced ASDA frozen diced tomatoes)
  3. Red Lentils (2 Cups to thicken)
  4. Red peppers (12 sliced)
  5. Orange sweet potatoes (5 medium to be grated finely Tesco)
  6. Onions (8 fresh and diced or 1 bag of Asda frozen onions)
  7. Carrots (8 grated finely or frozen already sliced)
  8. Fresh boiled beetroot (4 grated or finely sliced)
  9. Mushrooms (fresh or 3 bags of Asda frozen mushrooms)
  10. Dry mushrooms (only if on sale)
  11. Green peas (1Kg)
    Separately in another pot I cook the turkey meat mince with the wine and later add this to the Red Sauce once it is nice and thick, but still juicy.
    1. 2kg Turkey whole lean breasts (minced at home) or alternatively 2Kg of chicken lean breasts.
    2. Red Wine (one 75cl bottle, usually French)
    I throw the ingredients in my large pot, in the same order as are shown above, and start cooking and stirring. The thicker the sauce becomes the more often I need to stir the sauce.


    I add no water, no oils, no salt and no herbs nor spices at this stage. 
    I do stir frequently to avoid burning the bottom of the pan and cook until sauce is nice and thick, but still juicy. This might take between one and two hours. You may try multitasking by preparing the following...

    Fresh Herbs, Spices and Oils

    In earlier versions of this recipe, a few years back, I used to add herbs, spices and garlic to the red sauce pot and cook all together. In recent years I have discovered though the pleasure of “fresh or frozen” raw spices, herbs and garlic added at the end. 


    Fresh herbs have a character that I believe now the cooking can convert into other.  As explained in my Tips and Tricks blog, I do believe in freezing fresh herbs too. If I have time I leave them (in the list below: 1 to 7) to marinade in extra virgin olive oil for one or two hours:
    1. Red chillies
    2. Basil
    3. Rosemary
    4. Garlic (finely grated)
    5. Sage
    6. Tarragon
    7. Oregano
    8. Sun dried Tomatoes (chopped)
    9. Green olives (halved)
    10. Extra virgin olive oil
    11. Avocado Oil
    12. Red onions (sliced and raw)
    13. King Prawns (Asda cooked and peeled king prawns)

    Pasta
    I use exclusively brown pasta . I fill a medium/large pot with plenty of hot water (the pasta will absorb half of the water so make sure there is plenty of it in the pot). Bring to boil. Set your alarm clock to 8-9 min. max (even if box says 12 minutes - Italian pasta should never be over cooked and 12 min. are far too many to my opinion). 
    Throw the pasta in the boiling water and cook until alarm goes off. Drain off immediately all the water and stir well with extra virgin olive oil. Stir again after 10 min.. Cover (after 10 min.) and keep in the fridge for no more than two days. Do not mix pasta with sauce until just before consumption.


    Finally all comes together
    Pasta, red sauce, fresh herbs, spices and oils and optionally some roasted aubergines, red peppers or mushrooms come together. If any of these parts are added cold, I put all in a plastic bowl and microwave to heat up. 


    Freezing the red sauce in portions

    I use resealable freezer bags to divide my batch cooked sauce into individual portions. I transfer the sauce into each bag using a ladle while sauce is still piping hot and still simmering to avoid new bacteria building up while cooling down. I leave bags to cool down on my worktop for a couple of hours and before transferring them in the freezer, I wrap each bag inside a light sheet of tissue paper which avoids frozen bags sticking to each other. 


    Check your freezer instructions for speeding up the freezing of non-frozen food. I have a Fast Freezing button I leave on overnight until the whole batch is properly rock solid frozen and well hibernated. My freezer is a high end freezer which allows to keep food frozen food safely for over three months.


    Why do I not buy already minced meats

    I stopped buying already minced meats since I noticed that the amount of saturated fats in already minced meats (processed meats) is always away too high in comparison to lean meats. Saturated fats are a poison, a slow poison causing a variety of problems and diseases to our body. 

    Food should not harm, but nourish body and mind.


    Wednesday, 2 March 2011

    Panoramio March 2011 Contest

    For a long time I have wished to be able to find time to become an active user of Panoramio. So, I have finally managed to select my best shots and today, for the first time, I have entered the March 2011 Panoramio contest with five of my best shots.
    This is my Panoramio Page but, for the record I am adding the same pics to the post here below. Of course on Panoramio you will be able to identify the exact location in which these were shot. If you are curious to learn how I did so, well, just ask :)
    These are the pictures I entered for March 2011:

    Scenery - Olive Trees in Sicily


    Travel - Ragusa Ibla a Natale


    Scenery - Hay Fields Harvest in Dalgety Bay


    Heritage - Destruction of a Residential Historical Monument


    Travel - Glasgow Squinty Bridge - Clyde Arc


    Tuesday, 1 March 2011

    Wild Mountain Hiking - Bag List


    Passport (if going abroad)
    Train/Flights tickets and timetables
    cash money
    emergency Visa Credit (passwords)
    Ordnance Survey maps

    ACCESSORIES
    Portable/foldable mini-Rucksack
    Gaiters (look like this) buy larger version for next time
    Freezer Bags +
    2 or 3 large strong waterproof bags (ie to protect rucksacks outside window at night)
    Vitamins – aspirins – paracetamol and emergency kit
    Ice spray and elastic band for injuries
    Glue (loctite/attack)
    Elastic bands – pins – metal wire – binder clips - Velcro straps - knife
    Kite rope (for hanging wet clothes in the bothy)
    sewing kit (needle and strong black thread)
    Duct tape (small)
    Journal & Pencil
    Carabinas (like this)
    Garmin GPS (Google Maps to transfer paths and placemarks)
    Whistle
    Candles and lighter
    Headlights and spare batteries
    Hiking sticks
    Sleeping bags or duvet + inflatable mats + silk sheet + empty pillow case to fill up with clothes to use as night pillow.
    space blankets
    Lattix Gloves + Gardening gloves as outer layer (ie cut wood and climbing)
    Hot water bottle (mini or light)

    CAMPING COOKING
    Gas stove + gas lighting + spare gas cylinders
    Dish cloth
    Pans (to boil drinking water) or water Filtering system
    Yogurt plastic mug (lighter than metal) – 2 spoons – 1knife
    cling and foil film

    FIRE
    Matches / lighter
    Coal – fire starters
    secateur/axe/saw


    FOOD
    Salt - OliveOil - fructose - Tea - Coffe - Milk Powder ...
    Dry soups + dry pasta
    Chocolate with almonds and raisins
    home made musli bars
    Tuna tins
    home made bread and biscuits
    Whiskey
    Honey

    PERSONAL CARE
    Toothbrush - Toothpaste - sml bottle mouthwash - dental floss
    Eco friendly Soap
    Shower brush
    Hand cream (vaseline)
    Cottonfiock
    Nail cutters, tweezers
    Sun protection cream
    lip protection (vaseline)
    talc
    2 Travel towels if cold season
    Wet wipes
    Hands disinfectant

    TOYS
    Walking sticks (indispensable for hiking holidays)
    picnic towel
    Mini Sledges (if snow on mountain tops)
    Freezebee
    Cards / domino
    Smart phone (Recharging options)
    Camera + battery charger + tripod
    inflatable boat (lochs)
    CLOTHING
    bandana
    Waterproof trousers and jacket
    1 Waterproof Gloves
    1 mountain Hat
    1 Scarf (if needed)
    1 Underpants per day (unless in hot countries)
    5 socks
    2 vests
    1 Rohan trousers (day time)
    1 pair of Boots + waterproof spray
    1 Pair of Wet Shoes (to cross rivers)
    1 light trainers (or sleepers) for indoors night only
    2 jumpers
    1 Tshirt per day unless hot countries
    1 swimsuit (loch shower)
    1 pyjamas (dry night only) made of:
    •     1 trackie bottoms (tracksuit trousers)
    •     1 thick socks
    •     1 tight warm top
    •     1 pair of woolen night gloves
    •     1 hat (as above)


    Saturday, 19 February 2011

    DenisPizza: Sicilian Grilled Vegetables

    Ingredients for two pizza doughs: 
     
        1. Very strong wheat flour for bread  (not flour for cakes!) - 480 grams
        2. Fresh Milk - 400 ml
        3. One level tea spoon of salt
        4. Fresh yeast (the size of a fresh cherry or maybe two)
        5. A drop of extra virgin of olive oil


     Tip: You can use a "half pint glass" to measure the amount of flour. Each glass is one pizza.
      
    Instructions

    Pour the milk into a jug. Heat the milk in the microwave just barely. Milk should be lukewarm as if it would be meant for a newborn baby to drink.
    Too much heat will kill the yeast.
    Pour the yeast into the milk and add the salt. 


    Now stir with a spoon briskly for at least two minutes until milk is frothy and the yeast dissolved completely. Leave the mix milk-yeast-salt to rest for five minutes.
       
    Place the flour in a large bowl and pour the jug's content (milk + yeast + salt) over the flour. Now stir with a wooden spoon or even better a spatula. Mix this well with the flour.


    Once it is well mixed, the glue effect will be absorbed by the flour. Pour some dry flour on top of the dough and make into a shape of a ball. The dry flour will stop the dough from sticking to the bowl and help separate into the shape of a nice ball of dough.


    Sprinkle some dry flour onto your clean and dry worktop and transfer the dough ball onto it.
    We are preparing two pizzas, so the dough needs to be separated in half.


    Maintain the shape of the ball and crush with your hands to make a nice smooth rim. Then use a rolling pin to stretch it.


    The more you stretch the dough, the more likely it is for this to stick to the worktop, hence
    the secret is to gradually stretch a little and then sprinkle dry flour onto the worktop and the pizza base while stretching it.


    When the pizza base has expanded to the size of a pizza and to form a nice circle, dust off any extra dry flour from it ...


    ... and pour extra virgin olive oil on it.
     

    Now use your  finger tips to scatter the oil on the surface of the pizza base.


    When this side has been carefully oiled ...


    ... grab it, turn it upside down and kindly lay it on the pizza tray. The pizza base should be wider than the pizza tray, to allow this overflow effect you see below ... 


    The yeast in the dough is now alive and as sensitive as any living being to temperatures. If it is cold the rising of the dough can be  slowed down considerably, hence if you are not ready or you need extra time to get ready,  a good idea is to place the tray in the fridge to postpone the rising. The ideal temperature is a warm home temperature, in which case around 90 minutes will be enough time for this to happen.


    Whilst the pizza bases are quietly rising in the background, it is time to prepare the roasted mushrooms, aubergines and onions ...


    Slice them up ...


    Place slices on your grill pan (I bought mine in Ikea)...


    Careful not to burn them ...


    Same with the aubergines ...


    Once grilled these shrink and anyone would find hard to believe that you can actually place a whole aubergine on one pizza together with all the rest...


    And on the grill, again we are grilling, not burning... Timing is important and there is a perfect moment to pull them out of the fire...


    Grilled but yet juicy. They are going back in the oven with the pizza so no need to over cook them twice!


    When out of the grill leave them to cool down so that they dont soak in their own steam that will keep on coming out until they have cooled down. As shown below is ideal. Same with the mushrooms.


    And for the sake of repetition, similarly also the onions ...


    mmm .. I can smell them. Grilled vegetables release amazing scents which start building the appetite ...


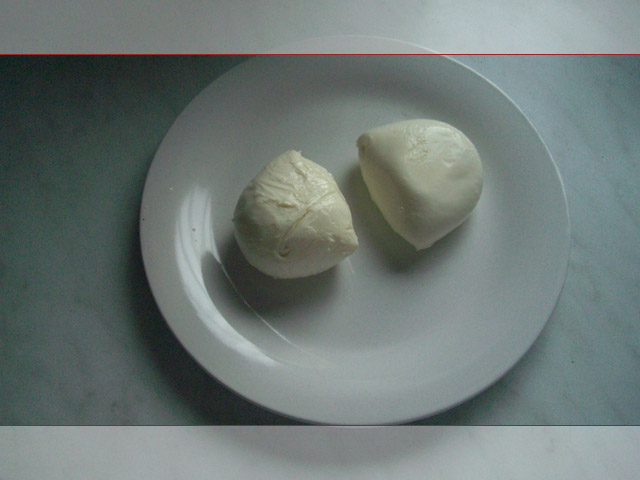
    Here are the fresh mozzarellas. Remember to check expiry dates and try to buy the freshest. One mozzarella should be enough for one pizza.


    Dice them up ...


    The grilling usually rises the temperature of your kitchen which also accelerates the rising of your pizza bases. You will noticed they have gained volume becoming particularly soft and delicate, so handle with care.


    We are now preparing the filled crust. We should use half mozzarella for the crust and the other half later as topping.


    Now time to brush milk on to the edges, this will turn the affected areas into self sticky to wrap the crust around the mozzarella dices ...


    Handle with extreme care, no need to apply too much pressure on the rised dough as we want to preserve this softness until they go to they go in the oven.


    And this is what we should aim at ...


    Now time to spread the tomato sauce (instructions for the sauce are separate in the Pizza Sauce Recipe) ....


    Again, careful when applying the sauce on to the pizza. No pressure is required, and the sauce should never spread on the pizza if hot. The shock will deflate the rising. Big tragedy! :)


    More fun here, it is time to lay our grilled vegetables on to the pizza ...


    Grilled aubergines, grilled mushrooms ...


    you may want to switch on the oven. 200 degrees is my favorite temperature, but all ovens are different. Mine for example is not ventilated and I know the ventilation speeds up the cooking.


    You can add olives, these are from Sicily...


    and very very tasty olives they are:


    Sun dried tomatoes are very welcome too ...


    And now it is time to add cheese and the other half mozzarella...


    Here is the parmisan ...


    Parmisan cheese is a very salty cheese, one table spoon sprinkled all over should also replace any need to add  more salt later...


    The pizza is almost ready, the last touch before going in is a sprinkle of oregano all around it.


    Now it is time to set your alarm clocks! If your oven is ventilated you will have to check the pizza every 10 minutes, and it hsould not take more than 20 minutes. Without ventilation my oven needs a good half an hour, but never leave the pizza unattended. Over cooking is not recommended...


    This is me checking the pizza after 10 minutes. As you can see the heat as made the pizza explode and rise even further. The smell of amazing food is becoming really strong in the house and so is everyone's appetite...


    Sicilian Spicy Seasoning: I finely grate four cloves of garlic and chop fresh herbs, like basil, sage, rosemary and a couple of red chillies. Then put them in a jug, pour extra virgin olive oil on it and leave for a couple of hours to soak. This seasoning is the final touch and it is poured raw with a spoon on top of the pizza when it comes out of the oven.  


    And if you have not forgotten the pizza to burn in the oven, this is what it should look/taste/smell like ...


    Enjoy! :)

    I will most definitely post more recipes, so, who knows we might bump into eachother again and hopefully soon. Ciao!